How to Configure a Firewall in 5 Easy Steps
Firewall is the first line of defense against online attackers. It forms a critical part of your network security. On a computer with an Internet connection, a firewall is designed to restrict Internet access, primarily to keep uninvited guests from getting into — or out of — the computer. The firewall effectively plugs holes left open from when the Internet was originally designed.
Configuring a firewall may come off as an intimidating task due to their technical nature. Breaking down the work into simpler tasks can help make the task manageable. This article will help you understand the major steps involved in configuring a firewall on your computer.
There are many firewall models available commercially that work equally well in protecting your system. The following steps are essential regardless of the firewall model you choose. This guide is put together with a view to help remote workers secure their systems and networks. Hence, it assumes that you are using a business grade firewall which will support multiple internal networks and performs a stateful packet inspection.
If you are using a basic firewall and just need guidance to configure it on your system, skip to the end of this article.
Step 1 – Secure Your Firewall
If an attacker can gain preferential access to your firewall, it is “game over” for your network security. Securing your firewall is the first and most important step of this process. Never put a firewall into action that is not properly secured by at least the following configuration actions:
Update your firewall to the latest firmware.
- Delete, disable, or rename any default user accounts and change all default passwords. Make sure to use only complex and secure passwords.
- If multiple administrators will manage the firewall, create additional administrator accounts with limited privileges based on responsibilities. Never use shared user accounts.
- Disable simple network management protocol (SNMP) or configure it to use a secure community string.
Step 2 – Architect Your Firewall Zones and IP Preferences
To protect the valuable assets on your network, you should first identify what the assets (for example, payment card data or patient data) are. Then plan out your network structure so that these assets can be grouped together and placed into networks (or zones) based on similar sensitivity level and function.
The more zones you create, the more secure your network. But keep in mind that managing more zones requires additional time and resources, so you need to be careful when deciding how many network zones you want to use.
Once you have designed your network zone structure and established the corresponding IP address scheme, you are ready to create your firewall zones and assign them to your firewall interfaces or sub interfaces.
Step 3 – Configure Access Control
Now that you have established your network zones and assigned them to interfaces, you should determine exactly which traffic needs to be able to flow into and out of each zone.
This traffic will be permitted using firewall rules called access control lists (ACLs), which are applied to each interface or sub interface on the firewall.
At the end of every access control list, make sure there is a “deny all” rule to filter out all unapproved traffic. Whenever possible, it is generally advised to disable your firewall administration interfaces (including both secure shell (SSH) and web interfaces) from public access. This will help to protect your firewall configuration from outside threats. Make sure to disable all unencrypted protocols for firewall management, including Telnet and HTTP connections.
Step 4: Configure your other firewall services and logging
If your firewall is also capable of acting as a dynamic host configuration protocol (DHCP) server, network time protocol (NTP) server, intrusion prevention system (IPS), etc., then go ahead and configure the services you wish to use. Disable all the extra services that you don’t intend to use.
Step 5: Test your firewall configuration
In a test environment, verify that your firewall works as intended. Don’t forget to verify that your firewall is blocking traffic that should be blocked according to your ACL configurations. Testing your firewall should include both vulnerability scanning and penetration testing.
Once you have finished testing your firewall, your firewall should be ready for production. Always remember to keep a backup of your firewall configuration saved in a secure place so that all your hard work is not lost in the event of a hardware failure.
Firewall management
With your firewall in production, you have finished your firewall configuration, but firewall management has just begun. Logs must be monitored, firmware must be updated, vulnerability scans must be performed, and firewall rules must be reviewed at least every six months. Last of all, be sure to document your process and be diligent about performing these ongoing tasks to ensure t6hat your firewall continues to protect your network. Firewall management is a critical step in ensuring continuous protection. CSG Technologies offer continuous monitoring of your security environment with regular updates and reports.
How to Set Up the Windows Firewall on Your PC
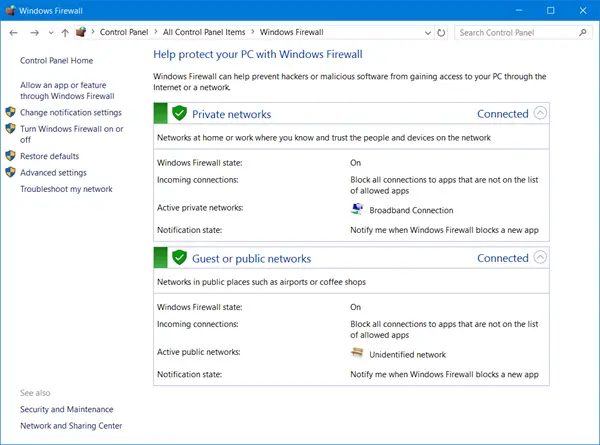
Windows comes with a firewall named, coincidentally, Windows Firewall. It’s accessed from the Control Panel. Follow these steps:
- Open the Control Panel.
- Click the System and Security heading.
- Click the Windows Firewall heading.
- The Windows Firewall window appears.
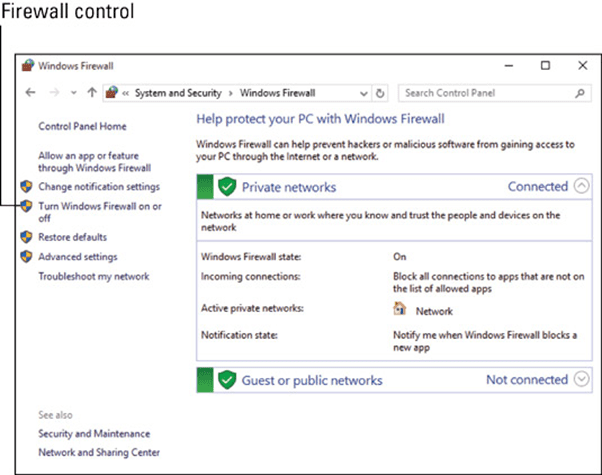
As far as you’re concerned, Windows Firewall has only two settings: on and off. To change the setting, click the Turn Windows Firewall “On” or “Off” link on the left side of the Windows Firewall window.
Once activated — and it should be activated — the Windows Firewall goes to work. When unwanted access is detected, either to or from the Internet, you see a pop-up window alerting you to the intrusion. At that point, you can choose to allow access by the named program by clicking the Allow Access button. If you want to continue blocking the program, just click Cancel.
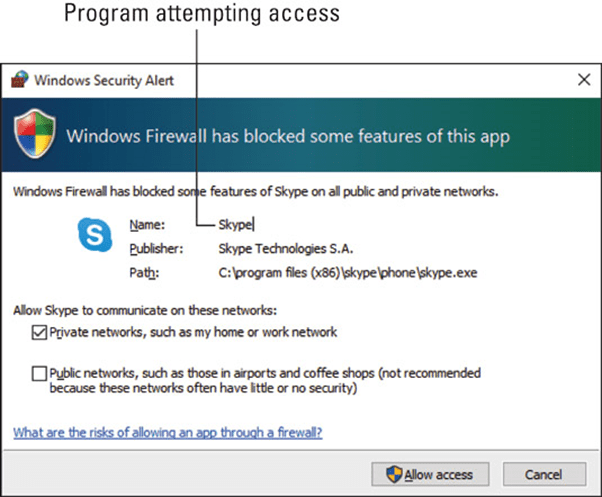
Above, the Skype program desires Internet access. If you start that program, the request is legitimate, and you should click the Allow Access button. If, on the other hand, you don’t recognize the program name, click the Cancel button, and the firewall thwarts the program’s attempted access.